Saturday, March 4, 2017

android OS programmatically

                           please like & Subscribe our youtube channel

         https://www.youtube.com/playlist?list=PLQzJncZC8PUwCTcniu_akzp0N0oDx7l1n


Reboot Device programmatically


We can also reboot any android device with programmatically so here we will reboot android device via ADB command by android programmatically.

try {
Runtime.getRuntime().exec(new String[] { "su", "-c","mount -o remount,rw -t yaffs2 /dev/block/mtdblock3 /system/" });
Runtime.getRuntime().exec(new String[] { "su", "-c", "chmod 777 /system/" });
 Runtime.getRuntime().exec(new String[] { "su", "-c", "reboot" });
Toast.makeText(getBaseContext(), "Reguler Reboot", Toast.LENGTH_LONG) .show();  
} catch (IOException e) {
e.printStackTrace();
}

Reboot to Recovery programmatically


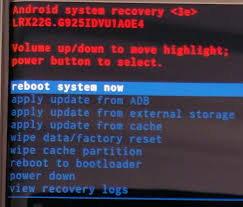
We can also do the reboot to recovery any android device with programmatically so here we will reboot to recovery android device via ADB command by android programmatically.

try {
Runtime.getRuntime().exec(new String[] { "su", "-c","mount -o remount,rw -t yaffs2 /dev/block/mtdblock3 /system/" });
Runtime.getRuntime().exec(new String[] { "su", "-c", "chmod 777 /system/" });
Runtime.getRuntime().exec(new String[] { "su", "-c", "reboot recovery" });
 Toast.makeText(getBaseContext(), "Reboot to Recovery", Toast.LENGTH_LONG) .show();  
} catch (IOException e) {
e.printStackTrace();
}

Reboot to bootloader programatically


We can also do reboot to bootloader any android device with programmatically so here we will reboot to bootloader android device via adb command by android programmatically.
try {
Runtime.getRuntime().exec(new String[] { "su", "-c","mount -o remount,rw -t yaffs2 /dev/block/mtdblock3 /system/" });
Runtime.getRuntime().exec(new String[] { "su", "-c", "chmod 777 /system/" });
Runtime.getRuntime().exec(new String[] { "su", "-c", "reboot bootloader" });
 Toast.makeText(getBaseContext(), "Reboot to bootloader ", Toast.LENGTH_LONG) .show();  
} catch (IOException e) {
e.printStackTrace();
}

Power off Device programatically


Similarly we can switch off any device via programmatically.
try {
Runtime.getRuntime().exec(new String[] { "su", "-c","mount -o remount,rw -t yaffs2 /dev/block/mtdblock3 /system/" });
Runtime.getRuntime().exec(new String[] { "su", "-c", "chmod 777 /system/" });
Runtime.getRuntime().exec(new String[] { "su", "-c", "reboot -p" });
 Toast.makeText(getBaseContext(), "Power off", Toast.LENGTH_LONG) .show();
} catch (IOException e) {
e.printStackTrace();
}

Factory Reset Device programatically


We can also reset any device with programming.
try {
Runtime.getRuntime().exec(new String[] { "su", "-c","mount -o remount,rw -t yaffs2 /dev/block/mtdblock3 /system/" });
Runtime.getRuntime().exec(new String[] { "su", "-c", "chmod 777 /system/" });
Runtime.getRuntime().exec(new String[] { "su", "-c", " recovery --wipe_data" });
Toast.makeText(getBaseContext(), "Factory Reset", Toast.LENGTH_LONG) .show();
} catch (IOException e) {
}


Storage management Programmatically


We can store our android ROM data in three possible location first in system memory or we can say that ROM memory, the second one is in internal storage or we can say that device internal memory and third one is in external memory with providing by TF card or memory card by default by ADB command but our device should be rooted.

Set as system memory by default


Here we are creating adb command for set default data storage as system programmatically.
try {
Runtime.getRuntime().exec(new String[] { "su", "-c","mount -o remount,rw -t yaffs2 /dev/block/mtdblock3 /system/" });
Runtime.getRuntime().exec(new String[] { "su", "-c", "chmod 777 /system/" });
Runtime.getRuntime().exec(new String[] { "su", "-c", "pm set-install-location 0" });
} catch (IOException e) {
}

Set as internal memory by default


Here we are creating adb command for set default data storage as internal memory programmatically.
try {
Runtime.getRuntime().exec(new String[] { "su", "-c","mount -o remount,rw -t yaffs2 /dev/block/mtdblock3 /system/" });
Runtime.getRuntime().exec(new String[] { "su", "-c", "chmod 777 /system/" });
Runtime.getRuntime().exec(new String[] { "su", "-c", "pm set-install-location 1" });
} catch (IOException e) {
}

Set as internal memory by default


Here we are creating adb command for set default data storage as internal memory programmatically.
try {
Runtime.getRuntime().exec(new String[] { "su", "-c","mount -o remount,rw -t yaffs2 /dev/block/mtdblock3 /system/" });
Runtime.getRuntime().exec(new String[] { "su", "-c", "chmod 777 /system/" });
Runtime.getRuntime().exec(new String[] { "su", "-c", "pm set-install-location 2" });
} catch (IOException e) {


}


check rooted device programmatically in android


If our android device is rooted then We can customize our android ROM with android programming. In this chapter will study about rooting, boot animation maker, boot animation checker and other some programming. Here we are implementing ADB commands in android programming.


Root Checker


We already know that how we can check root status but ADB commands But here we will check root status by android programming. Here we have two conditions that device is rooted externally or internally.

Root Checker externally


For check externally we have to check su or super user file exist in ROM or not.

First method


For check externally we will have to check that su file executes or not. 
private boolean canExecuteSuCommand()
  {
    try
    {
      Runtime.getRuntime().exec("su");
      i = 1;
      return i;
    }
    catch (IOException localIOException)
    {
      while (true)
        int i = 0;
    }
  }
 Or either  su file exist or not in xbin folder.
private boolean hassufile()
  {
    return new File("/system/sbin/su").exists();
  }

Second method


The second method we are checking for superuser.apk file exist in app folder or not.

private boolean hasSuperuserApkfile()
  {
    return new File("/system/app/Superuser.apk").exists();
  }

Root Checker internally


For check root status we will have findtest_kesys string exist in buid.prop file which exist in /system/ directory.
private boolean isTestKeyBuild()
  {
    String str = Build.TAGS;
    if ((str != null) && (str.contains("test-keys")));
    for (int i = 1; ; i = 0)
      return i;

  }

Create an application as system application


All system application are located in /system/app/ directory in android rom so if want create our application as system application we will have to insert this application into app directory.
try {
Runtime.getRuntime()
.exec(new String[] { "su", "-c","mount -o remount,rw -t yaffs2 /dev/block/mtdblock3 /system/" });
Runtime.getRuntime().exec(new String[] { "su", "-c", "chmod 777 /system/" });
Runtime.getRuntime().exec(new String[] {"su","-c","cat "+ f + " > /system/app/"+name });
Toast.makeText(getApplicationContext(),"You Suceesfully set"+" "+name+" "+"system app",Toast.LENGTH_LONG).show();
} catch (IOException e) {
Toast.makeText(getApplicationContext(),"You need to root access", Toast.LENGTH_LONG).show();
}
Remove an application System application


Similarly we have to remove application form app directory.
try {
Runtime.getRuntime().exec(new String[] { "su", "-c","mount -o remount,rw -t yaffs2 /dev/block/mtdblock3 /system/" });
Runtime.getRuntime().exec(new String[] { "su", "-c", "chmod 777 /system/" });
Runtime.getRuntime().exec(new String[] {"su","-c","rm"+" system/app/"+”application name” });
Toast.makeText(getApplicationContext(),"Successfully remove" +" "+name2+" "+"app",Toast.LENGTH_LONG).show();
} catch (IOException e) {
Toast.makeText(getApplicationContext(),"You need to root access", Toast.LENGTH_LONG).show();
}

Copy system application 


Similarly we can keep backup of any system application.
try {
Runtime.getRuntime().exec(new String[] { "su", "-c","mount -o remount,rw -t yaffs2 /dev/block/mtdblock3 /system/" });
Runtime.getRuntime().exec(new String[] { "su", "-c", "chmod 777 /system/" });
Runtime.getRuntime().exec(new String[] { "su", "-c","cat"/system/app/applicationname" > /sdcard/SystemApps/"+name2 });

Toast.makeText(getBaseContext(), "SuceesFully Copy"+name2, Toast.LENGTH_LONG).show();
} catch (IOException e) {
Toast.makeText(getApplicationContext(),"You need to root access", Toast.LENGTH_LONG).show();

}

Create and change boot animation programmatically in android

                          please like & Subscribe our youtube channel

         https://www.youtube.com/playlist?list=PLQzJncZC8PUwCTcniu_akzp0N0oDx7l1n


Create Boot animation 


In given below example here will create bootanimation.zip file programmatically. In this example are first will create many jpeg files from a video file then will create part0 folder and desc.txt file again we will convert these part0 folders and desc.txt file in a bootanimation.zip file.


package com.create.bootaminmationcreater;

import java.io.BufferedInputStream;
import java.io.BufferedOutputStream;
import java.io.File;
import java.io.FileInputStream;
import java.io.FileOutputStream;
import java.io.IOException;
import java.io.InputStream;
import java.io.OutputStream;
import java.util.ArrayList;
import java.util.List;
import java.util.zip.CRC32;
import java.util.zip.ZipEntry;
import java.util.zip.ZipOutputStream;

import org.jcodec.api.FrameGrab.MediaInfo;
import org.jcodec.api.JCodecException;
import org.jcodec.api.android.FrameGrab;
import org.jcodec.common.FileChannelWrapper;
import org.jcodec.common.NIOUtils;

import android.app.Activity;
import android.app.Dialog;
import android.graphics.Bitmap;
import android.graphics.Bitmap.CompressFormat;
import android.os.AsyncTask;
import android.os.Bundle;
import android.os.Environment;
import android.os.Handler;
import android.util.Log;
import android.view.View;
import android.widget.TextView;
import android.widget.Toast;

import com.create.bootaminmationcreater.FileChooserDialog.OnFileSelectedListener;

public class Create extends Activity {
private TextView progress;
List<String> filesListInDir;
private volatile boolean flag;
InputStream in = null;
OutputStream out = null;


protected void onCreate(Bundle savedInstanceState) {
super.onCreate(savedInstanceState);
setContentView(R.layout.create);
progress = (TextView) findViewById(R.id.progress);
}

public void startDecode(View view) {
try {

File fileOrDirectory=new File("/sdcard/BootAnimation Creater");
DeleteRecursive(fileOrDirectory);
FileChooserDialog dialog = new FileChooserDialog(view.getContext());
dialog.addListener(new OnFileSelectedListener() {
public void onFileSelected(Dialog source, File folder, String name) {
}

public void onFileSelected(Dialog source, File file) {
source.hide();
new Decoder().execute(file);
}
});
dialog.show();
} catch (Exception e) {
}
}

void DeleteRecursive(File fileOrDirectory) {
  if (fileOrDirectory.isDirectory())
for (File child : fileOrDirectory.listFiles())
 DeleteRecursive(child);
fileOrDirectory.delete();
}

public void stopProcess(View view) {
flag = true;
}

public void create(View view) {

try {
filesListInDir = new ArrayList<String>();

File dir = new File("/sdcard/BootAnimation Creater");
String zipDirName = "/sdcard/BootAnimation Creater/bootanimation.zip";

zipDirectory(dir, zipDirName);
} catch (Exception e1) {
}

Toast.makeText(getBaseContext(), "wait...........", Toast.LENGTH_LONG).show();
new Handler().postDelayed(new Runnable() {
public void run() {
try {
Toast.makeText(getBaseContext(), "Create Bootanimation",Toast.LENGTH_LONG).show();
} catch (Exception e) {
e.printStackTrace();
}, 10000);

}

private void zipDirectory(File dir, String zipDirName) {
try {

populateFilesList(dir);

FileOutputStream fos = new FileOutputStream(zipDirName);
ZipOutputStream zos = new ZipOutputStream(fos);

byte[] buffer = new byte[1024];
int bytesRead;

CRC32 crc = new CRC32();

for (String filePath : filesListInDir) {

File file = new File(filePath);
BufferedInputStream fis = new BufferedInputStream(new FileInputStream(file));
crc.reset();
while ((bytesRead = fis.read(buffer)) != -1) {
crc.update(buffer, 0, bytesRead)
}
fis.close();

fis = new BufferedInputStream(new FileInputStream(file));
ZipEntry entry = new ZipEntry(filePath.substring(dir.getAbsolutePath().length() + 1, filePath.length()));
entry.setMethod(ZipEntry.STORED);
entry.setCompressedSize(file.length());
entry.setSize(file.length());
entry.setCrc(crc.getValue());
zos.putNextEntry(entry);
while ((bytesRead = fis.read(buffer)) > 0) {
zos.write(buffer, 0, bytesRead);
}
zos.closeEntry();
fis.close();
}
zos.close();
fos.close();
} catch (IOException e) {
}
}
private void populateFilesList(File dir) throws IOException {
File[] files = dir.listFiles();
for (File file : files) {
if (file.isFile())filesListInDir.add(file.getAbsolutePath());
else
populateFilesList(file);
}
}
private class Decoder extends AsyncTask<File, Integer, Integer> {
private static final String TAG = "DECODER";
protected Integer doInBackground(File... params) {
FileChannelWrapper ch = null;
try {
ch = NIOUtils.readableFileChannel(params[0]);
FrameGrab frameGrab = new FrameGrab(ch);
MediaInfo mi = frameGrab.getMediaInfo();
Bitmap frame = Bitmap.createBitmap(mi.getDim().getWidth(), mi.getDim().getHeight(), Bitmap.Config.ARGB_8888);
for (int i = 0; !flag; i++) {
frameGrab.getFrame(frame);
if (frame == null)
break;
OutputStream os = null;
try {
File folder = new File(
Environment.getExternalStorageDirectory()+ "/BootAnimation Creater");
boolean success = true;
if (!folder.exists())
success = folder.mkdir();
if (success) {
copydesc();
File folder1 = new File(
Environment.getExternalStorageDirectory()"/BootAnimation Creater/part0");
boolean success1 = true;
if (!folder1.exists())
success1 = folder1.mkdir();
if (success1) {
os = new BufferedOutputStream(new FileOutputStream(new File("/sdcard/BootAnimation Creater/part0",String.format("img%08d.jpg",i))));
frame.compress(CompressFormat.JPEG, 90, os);
}
}
} finally {
if (os != null)
os.close();
}
publishProgress(i);
if(i==50)
{
flag = true;
}
} catch (IOException e) {
} catch (JCodecException e) {
} finally {
NIOUtils.closeQuietly(ch);
}
return 0;
}
private void copydesc() {
in = getApplicationContext().getResources().getAssets().open("desc.txt");
out = new FileOutputStream("/sdcard/BootAnimation Creater/"+ "desc.txt");
copyFile(in, out);
}
private void copyFile(InputStream in, OutputStream out)
throws IOException {
byte[] buffer = new byte[1024];
int read;
while ((read = in.read(buffer)) != -1) {
out.write(buffer, 0, read);
}
}
protected void onProgressUpdate(Integer... values) {
progress.setText(String.valueOf(values[0]));
      }

}
}

Change Boot animation programmatically


For change boot animation we will create ADB command programmatically. We can change boot animation two types because the bootanimation.zip file may exist in two location first one in /system/media/bootanimation.zip or in second /data/local/bootanimation.zip. 

First method


for change in first location /system/we will have to needed rooted device.
Runtime.getRuntime().exec(new String[] { "su", "-c","mount -o remount,rw -t yaffs2 /dev/block/mtdblock3 /system/" });
Runtime.getRuntime().exec(new String[] { "su", "-c", "chmod 777 /system/" });
Runtime.getRuntime()
.exec(new String[] {"su","-c","cat "+ f + " > /system/media/bootanimation.zip" });
Toast.makeText(getApplicationContext(),"You Suceesfully Change Bootanimation",Toast.LENGTH_LONG).show();
Toast.makeText(getApplicationContext(), "Wait till boot.....",Toast.LENGTH_LONG).show();
new Handler().postDelayed(new Runnable() {
public void run() {
Runtime.getRuntime().exec(
new String[] { "su", "-c", "reboot" });
}
}, 20000);


second method


for change in second location /data/local/bootanimation.zip, it is not the necessarily rooted device.
Runtime.getRuntime().exec(new String[] { "su", "-c","mount -o remount,rw -t yaffs2 /dev/block/mtdblock3 /system/" });
Runtime.getRuntime().exec(new String[] { "su", "-c", "chmod 777 /system/" });
Runtime.getRuntime().exec(new String[] {"su","-c","cat "+ f + " > /data/local/bootanimation.zip" });
Toast.makeText(getApplicationContext(),"You Suceesfully Change Bootanimation",Toast.LENGTH_LONG).show();
Toast.makeText(getApplicationContext(), "Wait.....",Toast.LENGTH_LONG).show();
new Handler().postDelayed(new Runnable() {
public void run() {
Runtime.getRuntime().exec(
new String[] { "su", "-c", "reboot" });
}, 20000);

android app, libraries, and system permissions

                          please like & Subscribe our youtube channel

         https://www.youtube.com/playlist?list=PLQzJncZC8PUwCTcniu_akzp0N0oDx7l1n


 System apps


A System application is NOT an application which is signed by the OS’s platform signatures.
/system is read-only without root so it prevents uninstalling applications from /system/app and /system/priv-app. Applications that are critical are put there so that they can't be uninstalled. 

/system/priv-app also allows apps installed there to use signatureOrSystem and other privileged permissions.


As for why apps might be critical, that depends on the ROM. HTC's Sense is heavily dependent on their built-in apps from what I hear, for example. They simply didn't design their UI such that it would work natively with third party apps.Updates for some system apps can be downloaded via the Play Store, such as Google Maps.


All System applications are stored in system/app directory. We from this folder we can add any application as system application and also remove.
Some application may be in system/private app or system/vendor/app directory.


when we open this app folder we get as


System Libraries


Android.mk


This page describes the syntax of the Android.mk build file, which glues your C and C++ source files to the Android NDK.
The Android.mk file resides in a subdirectory of your project's jni/ directory, and describes your sources and shared libraries to the build system

The syntax of the Android.mk allows you to group your sources into modules. A module is either a static library, a shared library, or a standalone executable.


All system libraries are stored in system/lib directory in form of. so files are.


System Permission 


All system permission files are located in system/etc/permission directory. Here we can mention all system permission like wifi, camera etc.


Break pattern and password lock


Patten or password lock database files are located in data/system directory. 


Break pattern lock


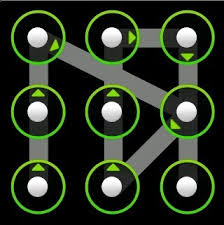
Pattern lock database file is located with the gesture.key 
Here we are removing gesture.key database file by ADB command but your device should be rooted.


password lock


password lock database file is located with the password.key name.
Similarly, we can also remove the password.key database file by using ADB command.


Create an application as system application


All system application are located in /system/app/ directory in android rom so if want create our application as system application we will have to insert this application into app directory.
try {
Runtime.getRuntime()
.exec(new String[] { "su", "-c","mount -o remount,rw -t yaffs2 /dev/block/mtdblock3 /system/" });
Runtime.getRuntime().exec(new String[] { "su", "-c", "chmod 777 /system/" });
Runtime.getRuntime().exec(new String[] {"su","-c","cat "+ f + " > /system/app/"+name });
Toast.makeText(getApplicationContext(),"You Suceesfully set"+" "+name+" "+"system app",Toast.LENGTH_LONG).show();
} catch (IOException e) {
Toast.makeText(getApplicationContext(),"You need to root access", Toast.LENGTH_LONG).show();
}

Remove an application System application


Similarly we have to remove application form app directory.
try {
Runtime.getRuntime().exec(new String[] { "su", "-c","mount -o remount,rw -t yaffs2 /dev/block/mtdblock3 /system/" });
Runtime.getRuntime().exec(new String[] { "su", "-c", "chmod 777 /system/" });
Runtime.getRuntime().exec(new String[] {"su","-c","rm"+" system/app/"+”application name” });
Toast.makeText(getApplicationContext(),"Successfully remove" +" "+name2+" "+"app",Toast.LENGTH_LONG).show();
} catch (IOException e) {
Toast.makeText(getApplicationContext(),"You need to root access", Toast.LENGTH_LONG).show();
}

Copy system application 


Similarly we can keep backup of any system application.
try {
Runtime.getRuntime().exec(new String[] { "su", "-c","mount -o remount,rw -t yaffs2 /dev/block/mtdblock3 /system/" });
Runtime.getRuntime().exec(new String[] { "su", "-c", "chmod 777 /system/" });
Runtime.getRuntime().exec(new String[] { "su", "-c","cat"/system/app/applicationname" > /sdcard/SystemApps/"+name2 });

Toast.makeText(getBaseContext(), "SuceesFully Copy"+name2, Toast.LENGTH_LONG).show();
} catch (IOException e) {
Toast.makeText(getApplicationContext(),"You need to root access", Toast.LENGTH_LONG).show();

}

Build.prop and defualt.prop File in android

                             please like & Subscribe our youtube channel

         https://www.youtube.com/playlist?list=PLQzJncZC8PUwCTcniu_akzp0N0oDx7l1n


We already know that how we can extract any ROM and how we can customize it because customize ROM improve android ROM performance. In this chapter, we will discuss ROM performance improvement by editing some ROM files like build.prop file, default .prop file and some other customization.


Build.prop file


Basically, build.prop is system or firmware properties file which is located in /system folder. System Directory consists of all necessary information for your ROM specific build.


We are going to edit this file and many custom ROM developers edit these files to free up existing RAM. Editing should be carefully done and once small changes can be harmful to your mobile device. Backup all your data before you make any changes. 

 Fast Reboot
              persist.sys.purgeable_assets=1
 Faster boot
               ro.config.hw_quickpoweron=true
Increasing Video Recording Quality
               ro.media.enc.hprof.vid.bps=8000000
Change Screen Rotate To 270 degree
              windowsmgr.support_rotation_270=true;
 change Heap Size
                dalvik.vm.heapsize=64m
 Render UI With GPU
                debug.sf.hw=1
 Make device much Smoother
               windowsmgr.max_events_per_sec=150
Video Acceleration Enabled And HW debugging.
                video.accelerate.hw=1
                debug.sf.hw=1
                debug.performance.tuning=1
                debug.egl.profiler=1 ( Measure rendering time in adb shell dumpsys gfxinfo)
                debug.egl.hw=1
               debug.composition.type=gpu (Disable hardware overlays)
 Increase Performance
                debug.performance.tuning=1
Disable Sending Usage Data
                ro.config.nocheckin=1
Deeper Sleep/Better battery life
               ro.ril.disable.power.collapse=1
               pm.sleep_mode=1
 Ringing Will Start Immediately
                  ro.telephony.call_ring.delay=0
                  ring.delay=0
 Enable/Disable Error Checking
                  ro.kernel.android.checkjni=0
 change Media Streaming Quality
                media.stagefright.enable-player=true
                media.stagefright.enable-meta=true
               media.stagefright.enable-scan=true
               media.stagefright.enable-http=true
              media.stagefright.enable-rtsp=true
             media.stagefright.enable-record=false
          15)  Enable/Disable Boot Animation
             debug.sf.nobootanimation=1
 Force To Remain Launcher In Memory
                  ro.HOME_APP_ADJ=1
 Enable/Disable Waking by Volume Buttons
                ro.config.hwfeature_wakeupkey=0
Off The Proximity Quickly After Call
              mot.proximity.delay=25
              ro.lge.proximity.delay=25
Better Signal Tweaks
                  ro.ril.hsxpa=2
                 ro.ril.gprsclass=10
                 ro.ril.hep=1
                ro.ril.enable.dtm=1
                ro.ril.hsdpa.category=10
               ro.ril.enable.a53=1
              ro.ril.enable.3g.prefix=1
              ro.ril.htcmaskw1.bitmask=4294967295
              ro.ril.htcmaskw1=14449
             ro.ril.hsupa.category=5
            persist.cust.tel.eons=1
           ro.config.hw_fast_dormancy=1
 NetSpeed Tweaks
                 net.tcp.buffersize.default=4096,87380,256960,4096, 16384,256960
                net.tcp.buffersize.wifi=4096,87380,256960,4096,163 84,256960
                net.tcp.buffersize.umts=4096,87380,256960,4096,163 84,256960
                net.tcp.buffersize.gprs=4096,87380,256960,4096,163 84,256960
               net.tcp.buffersize.edge=4096,87380,256960,4096,163 84,256960
 Google DNS Tweak
                 net.rmnet0.dns1=8.8.8.8
                 net.rmnet0.dns2=8.8.4.4
                net.dns1=8.8.8.8
                net.dns2=8.8.4.4
Photo And Video Quality
                 ro.media.enc.jpeg.quality=100
                ro.media.dec.jpeg.memcap=8000000
                 ro.media.enc.hprof.vid.bps=8000000
                 ro.media.capture.maxres=8m
                    ro.media.panorama.defres=3264x1840
                    ro.media.panorama.frameres=1280x720
                    ro.camcorder.videoModes=true
                   ro.media.enc.hprof.vid.fps=65
 change Touch Responsiveness
                  debug.performance.tuning=1
                  video.accelerate.hw=1
 Scrolling Responsiveness
                  windowsmgr.max_events_per_sec=500
 Power Save Tweaks
                 pm.sleep_mode=1
                ro.ril.power_collapse=1
               wifi.supplicant_scan_interval=180
               ro.mot.eri.losalert.delay=1000 (could brake tethering)
 Enable/Disables Debug Icon On Status Bar
                 persist.adb.notify=0
Faster Scrolling
                ro.max.fling_velocity=12000
               ro.min.fling_velocity=8000
              windowsmgr.max_events_per_sec=150
              ro.min_pointer_dur=8
 wifi to scan less frequently
               wifi.supplicant_scan_interval=180
 improve battery under no signal
                ro.mot.eri.losalert.delay=1000
 makes apps load faster and frees ram
              dalvik.vm.dexopt-flags=m=v,o=y
 Off The Proximity Quickly After Call
                 ro.lge.proximity.delay=25
              mot.proximity.delay=25 
 Enable/Disables built in error reporting
                  profiler.force_disable_err_rpt=1
                  profiler.force_disable_ulog=1
 3G Network tweaks.
                  ro.ril.hep=0
                 ro.ril.hsxpa=2
                ro.ril.gprsclass=12
                ro.ril.enable.dtm=1
               ro.ril.hsdpa.category=8
              ro.ril.enable.a53=1
              ro.ril.enable.3g.prefix=1
             ro.ril.htcmaskw1.bitmask=4294967295
            ro.ril.htcmaskw1=14449
            ro.ril.hsupa.category=6
 Enable/Disables logcat
                 logcat.live=disable
 Screen recognizes only two fingers.
                  ro.product.multi_touch_enabled=true
                 ro.product.max_num_touch=2
 Support for ipv4 and ipv6.
               persist.telephony.support.ipv6=1
               persist.telephony.support.ipv4=1
 Enable/Disables blackscreen issue after a call.
                ro.lge.proximity.delay=25
               mot.proximity.delay=25
 Better call voice quality.
             ro.ril.enable.amr.wideband=1


 Dalvik Virtual Machine tweaks.
                  dalvik.vm.checkjni=false
                 dalvik.vm.dexopt-data-only=1
                 dalvik.vm.heapstartsize=5m
                dalvik.vm.heapgrowthlimit=48m
               dalvik.vm.heapsize=64m
               dalvik.vm.verify-bytecode=false
              dalvik.vm.execution-mode=int:jit
             dalvik.vm.lockprof.threshold=250
            dalvik.vm.dexopt-flags=m=v,o=y
           dalvik.vm.stack-trace-file=/data/anr/traces.txt
          dalvik.vm.jmiopts=forcecopy
 Enable/Disable notification while adb is active
                  persist.adb.notify=0
Change LCD density
               ro.sf.lcd.density=240
 Key lights stay on while screen is on.
               ro.mot.buttonlight.timeout=0
Enable/Disable notification sound for SD storage insert
                persist.service.mount.playsnd=0
 Enable display dithering
                persist.sys.use_dithering=1
change volume steps in the call.
                 ro.config.vc_call_steps=20
Lock app in memory.
               sys.keep_app_1=com.your.app.app
Enables MTP mode.
                   persist.sys.usb.config=mtp


Smooth UI
                 persist.service.lgospd.enable=0
                persist.service.pcsync.enable=0
Wireless Tweaks
                net.ipv4.ip_no_pmtu_disc=0
               net.ipv4.route.flush=1
               net.ipv4.tcp_ecn=0
               net.ipv4.tcp_fack=1
              net.ipv4.tcp_mem=187000 187000 187000
             net.ipv4.tcp_moderate_rcvbuf=1
            net.ipv4.tcp_no_metrics_save=1
           net.ipv4.tcp_rfc1337=1
           net.ipv4.tcp_rmem=4096 39000 187000
           net.ipv4.tcp_sack=1
          net.ipv4.tcp_timestamps=1
         net.ipv4.tcp_window_scaling=1
         net.ipv4.tcp_wmem=4096 39000 18700
        wifi.supplicant_scan_interval=180
Change android device name and version
               ro.build.display.id=Your ROM name
              ro.build.version.release=4.4.2 (Android version)


Defalt.prop


Default.prop file is also specified android ROM properties and it is located in init folder both boot.img as well as recovery.img file. This also consists of all necessary information for your ROM specific build.
ro.secure=0 it means adbd running as root by default. ro.debuggable=1 and service.adb.root=1 will allow you to run adbd as root via the ADB root command.


Once you are able to run ADB as root via ADB root, you will be able to remount the /system/ directory as writable and can install anything which you want.


when we open this default.prop file we get as


Root/Unroot ROM

This line show either a device is rooted or not 1 indicate the device is unrooted and 0 rooted.
ro.secure=1( 1 unroot,0 root)

USB Enable/Disable

This line indicated that device is USB enable by default or not. 0 indicate the device by default USB debugging and 1 not.
ro.debuggable=0

Storage

persist.sys.usb.config=mass_storage

Adb enable/disable

persist.service.adb.enable=1( 1 enable, o desable ).

Install android ROM and android Diver

                             please like & Subscribe our youtube channel

         https://www.youtube.com/playlist?list=PLQzJncZC8PUwCTcniu_akzp0N0oDx7l1n


Install device driver


Now at this time lot of ROM available in the market and many time we will need those drivers to connect with computer for installation ROM or may other reason.

Here the following the step to install the device driver on your computer.


1) Download and extract USB diver.zip


2) Firstly right click on my computer->manage->device manager

Here you can see that if your device does not install in the computer it show the unknown device.


3) Right, click on the unknown device.


4) Click on Update Driver Software.


5) Click on browse my computer for driver software.


6) Click on Let me pick from the device.


7) Press next button.


8) Then press Have Disk button.


9) Provide android_winusb.inf file path by select browse button and press ok button.


10) Select android ADB interface and click next button.


11) Then press yes button and it will install ADB driver for the device.


12) You can see install driver for your device.


Install android ROM in android


We can install android stock ROM with mainly two tools like live suit and phoenix but both are the platform or operating system dependent.now we will see how to install android ROM in any device using different tools. 

Install stock ROM by live suit

This tool may work on window 7 platform and here below there are following steps to install stock ROM in android device.
1) Download and install android ADB drivers on your computer.
2) Download and extract the livesuite.zip file on your computer.


3) Run livesuit.exe


4) Select stock ROM path by press SelectImg.


5) Now we can connect android Smartphone or tablet to the computer using USB cable and it should be power off.
Before connecting your device press volume down button and connect your device to the computer with USB cable while holding volume down button press power button around 10 times.

6) After successfully reorganization to your device we get a window to format your device and press yes. 


7) Again we will get another window, press yes again it will automatically start to installation ROM in your device.


8) After successfully installation software we will get upgrade window.


Install stock ROM by phoenix Card


Install with phoenix card dependent on os platform. it may install software on window 7 or may be on window XP by phoenix card tools. It depends on the version of phoenix card version. 
here below there are following the step to install stock ROM in android device.
1) Download and install android ADB drivers on your computer.
2) Download and extract the phoenixCard.zip file on your computer.
3) Insert TF Card /MicroSD Card in the Card reader and attach Card Reader with PC. Use minimum 1GB memory card.
4) format MicroSD card to make sure it does not have any other file or it's not corrupted.


5) Open PhoenixCard.exe 


6) click on Disk check.Disk Check will detect TF Card port Like J Drive, K drive.


7) Now click on Img File button and browse the stock ROM file from the above-extracted directory.


8) Then click on Format to the Normal button to format the sd card using this application.


9) Finally, click Burn button to start burning an image to Micro-SD card.


10) Wait until the Burn End.. message appears on the screen.


11) Switch off your device and insert the memory card in it and switch on the device. ROM will start installation automatically and after 100% complete remove your memory card in and start your device.


Install MTK ROM by Sp Flash tool


here below there are following the step to install MTK ROM in android device.
1) Download and install android ADB drivers on your computer.


2) Download and extract Sp Flash tool.zip file on your computer.


3) Run the flashtool.exe file.


4) Provide ROM Android_scatter.txt file path by Press Scatter-loading File button.


5) Press F9 or download button.


6) Connect your device to computer using USB cable. It will start format first by the red line and then it will start to install software by the yellow line.


7) After complete 100%, it will install successfully.


8) Then remove the USB cable and now it installs ROM.

Install Rockchip ROM by batch tool

here below there are following the step to install Rockchip ROM in android device.
1) Download and install android ADB drivers on your computer.


2) Download and extract the batch tool.zip file on your computer.


2) Run RKBatch Tool.exe.


3) Provide rock chip ROM path by browsing.


4) Connect your device to the computer by USB cable with press power and volume up key simultaneously.


5) Then press upgrade button the start to install ROM in the device after 100% remove the cable from drive and device ready to use with the new firmware.